Before starting the procedure description, it is important to understand the relationship between:
- Hardware
- Firmware
- Engine maps (.DIS files for WSSP NG)
- Strategy maps
To work the ECU needs in THIS SEQUENCE.
- Firmware
- Engine (.DIS bike specific map)
- Strategy
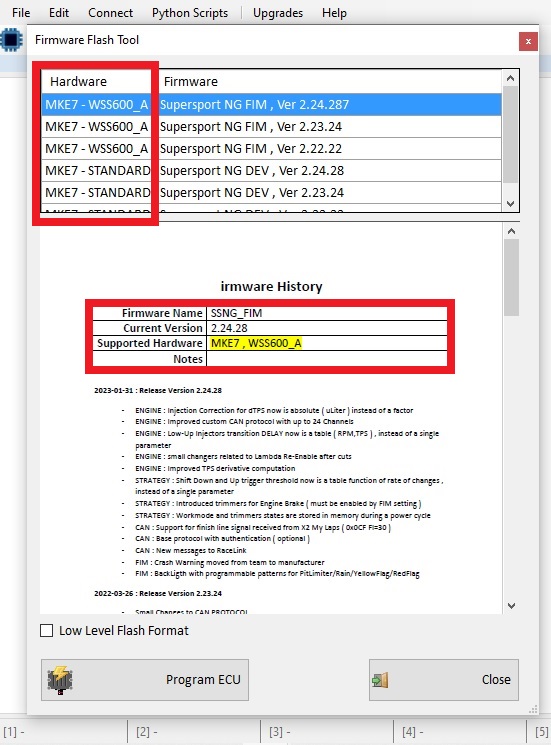
Hardware and firmware are strictly related. Firmwares are made for a specific hardware.
Example 1:
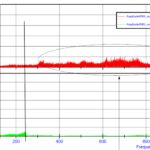
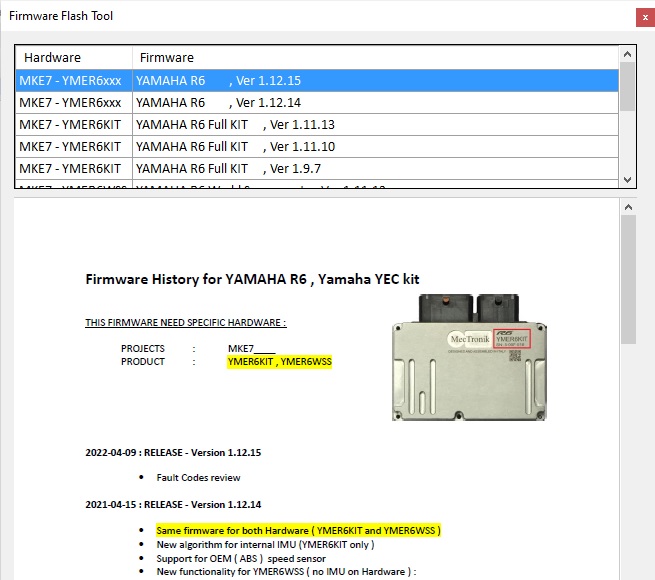
On a YAMAHA YMERWSS or YMERKIT only the specific firmware will work. It is not possible to use a firmware made for the WSS_A model. The Firmware flash tool will always show which hardware is NEEDED for that firmware as shown in the image below.
The correct Firmware for YMERWSS or YMERKIT is in the Yamaha WORKSPACE. There is no WSSP NG firmware for these ECUs. Below an example screenshot of some available Yamaha firmwares for YMERWSS or YMERKIT with the related hardware.
Each Hardware has related Firmware. Each Firmware has related engine maps (e.g. .DIS maps) as the example shown below. The ECU needs Firmware, Engine and Strategy files to work, installed in this sequence: first the Firmware, then the Engine file and lastly the Strategy file.
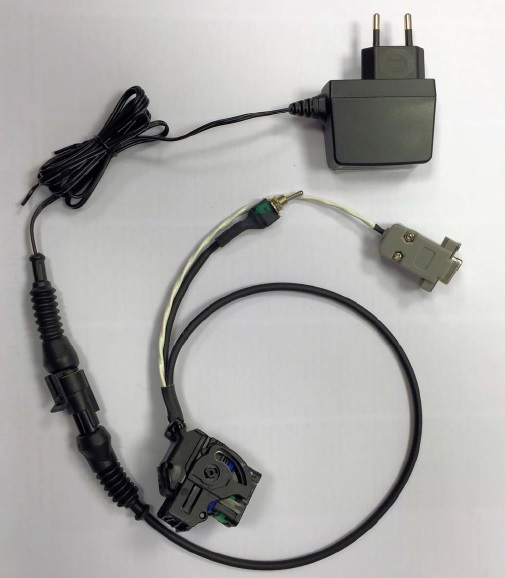
FIRMWARE UPDATE KIT :
To write or update firmware you need:
FIRMWARE UPDATE PROCEDURE :
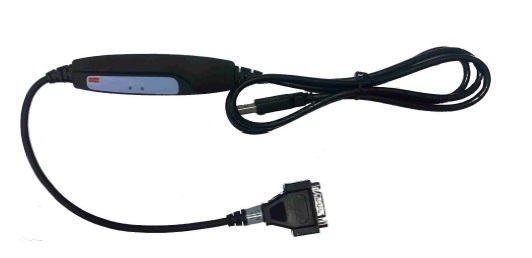
1. Plug the CAN USB Type K in the computer.
2. Connect the CAN USB Type K to the Programming Kit
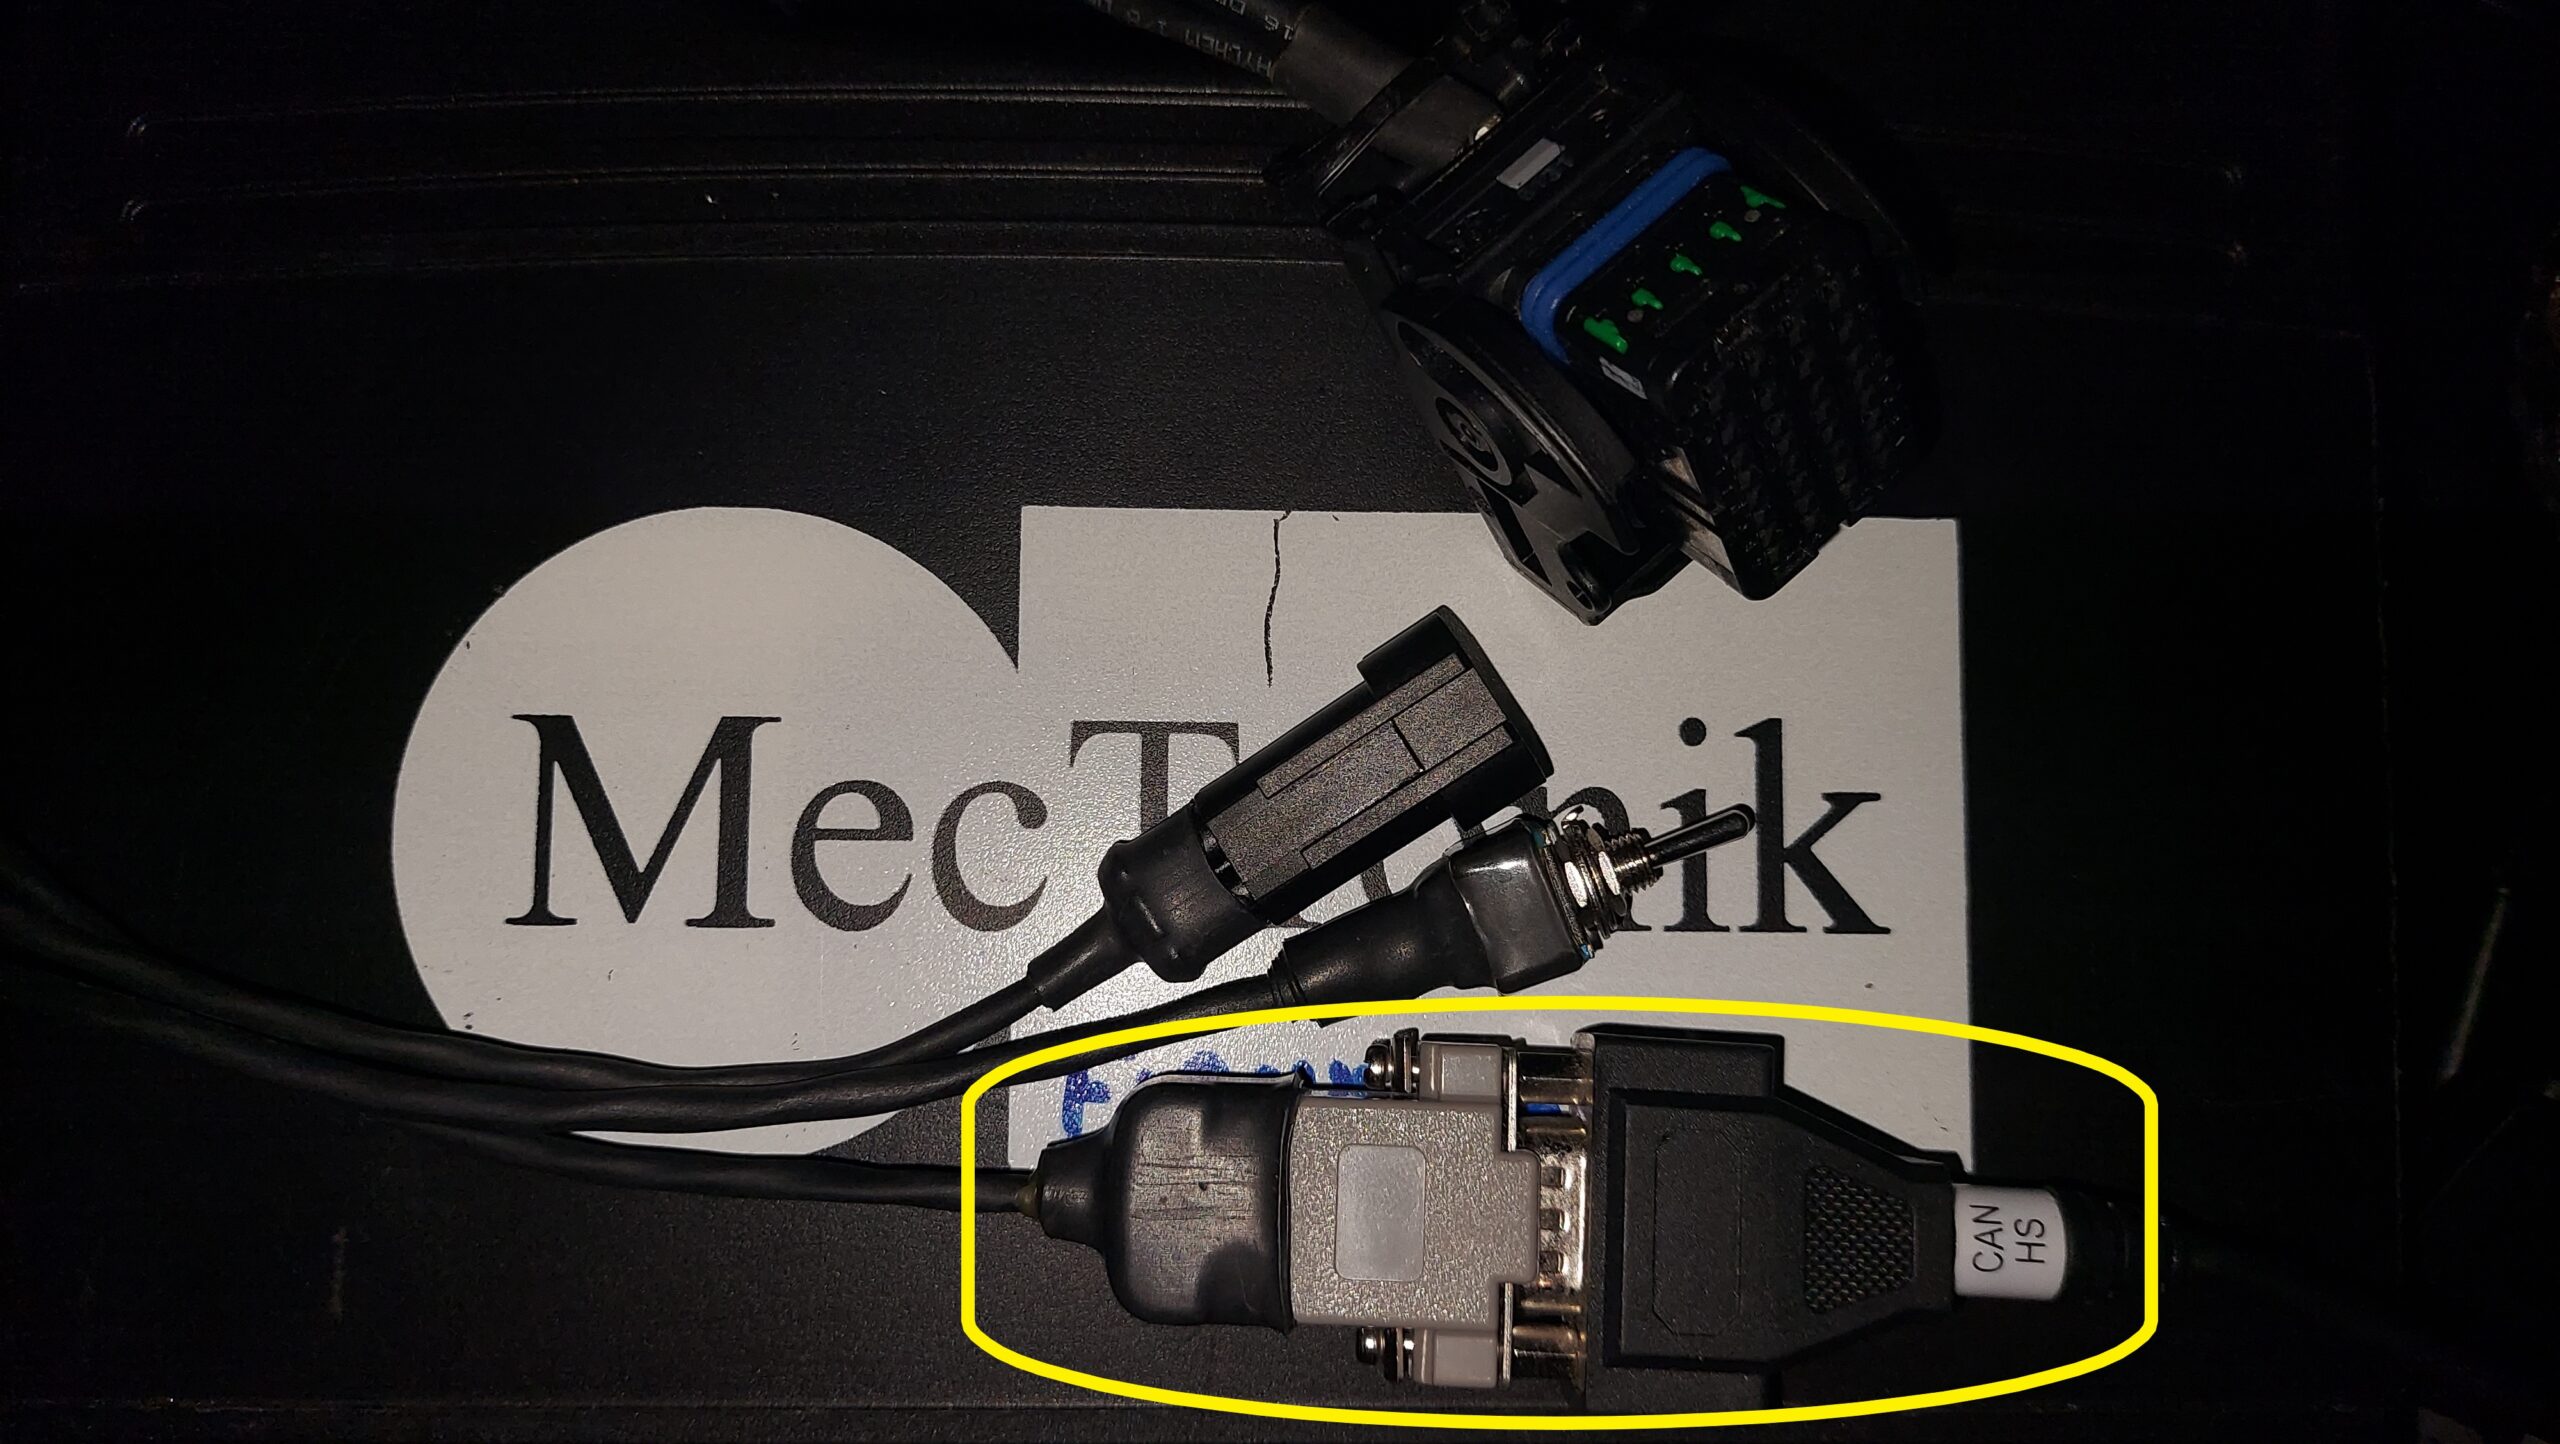
3. Connect the Programming Kit to the ECU

4. Connect the Programming Kit to the power supply.
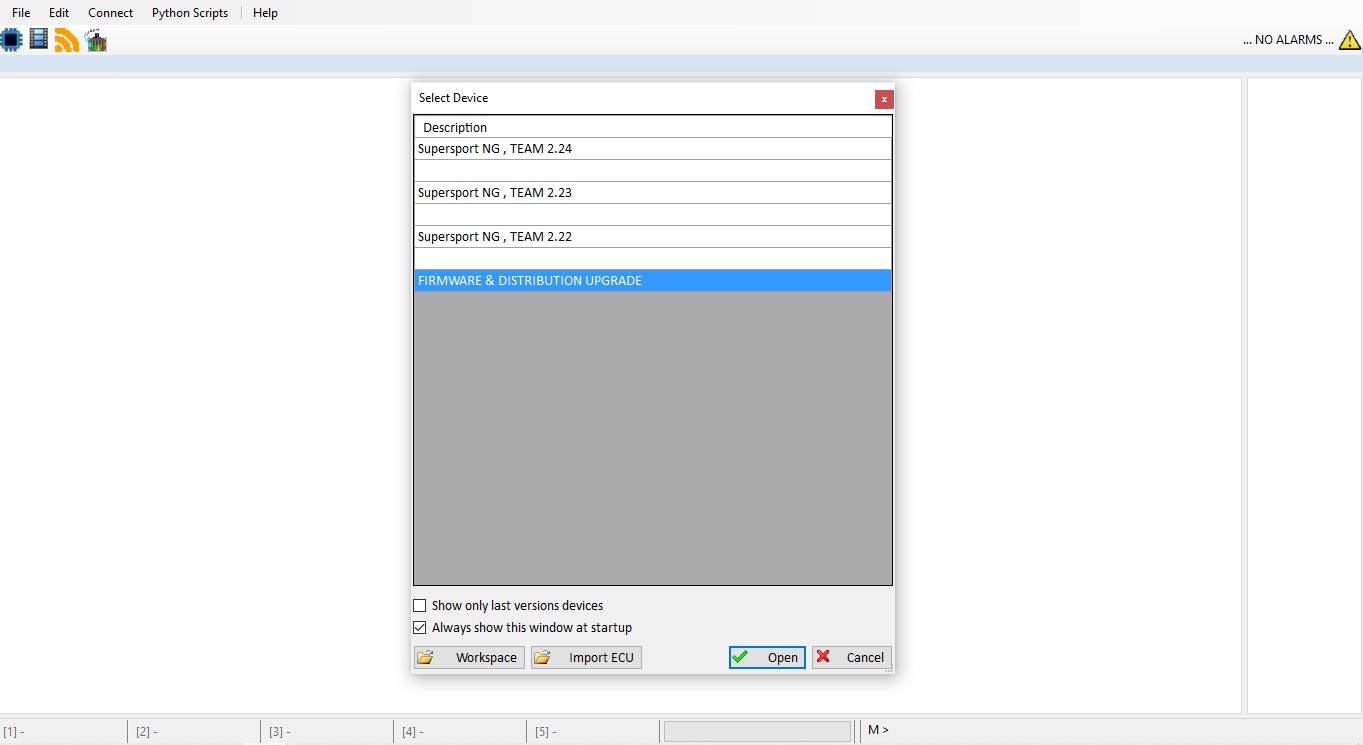
5. Start Mecal
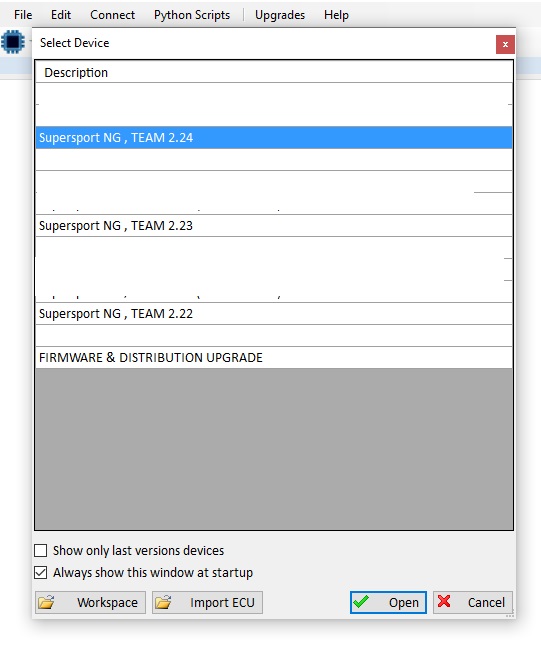
6. Select Firmware and Distribution Upgrade in the Select Device window and click Open
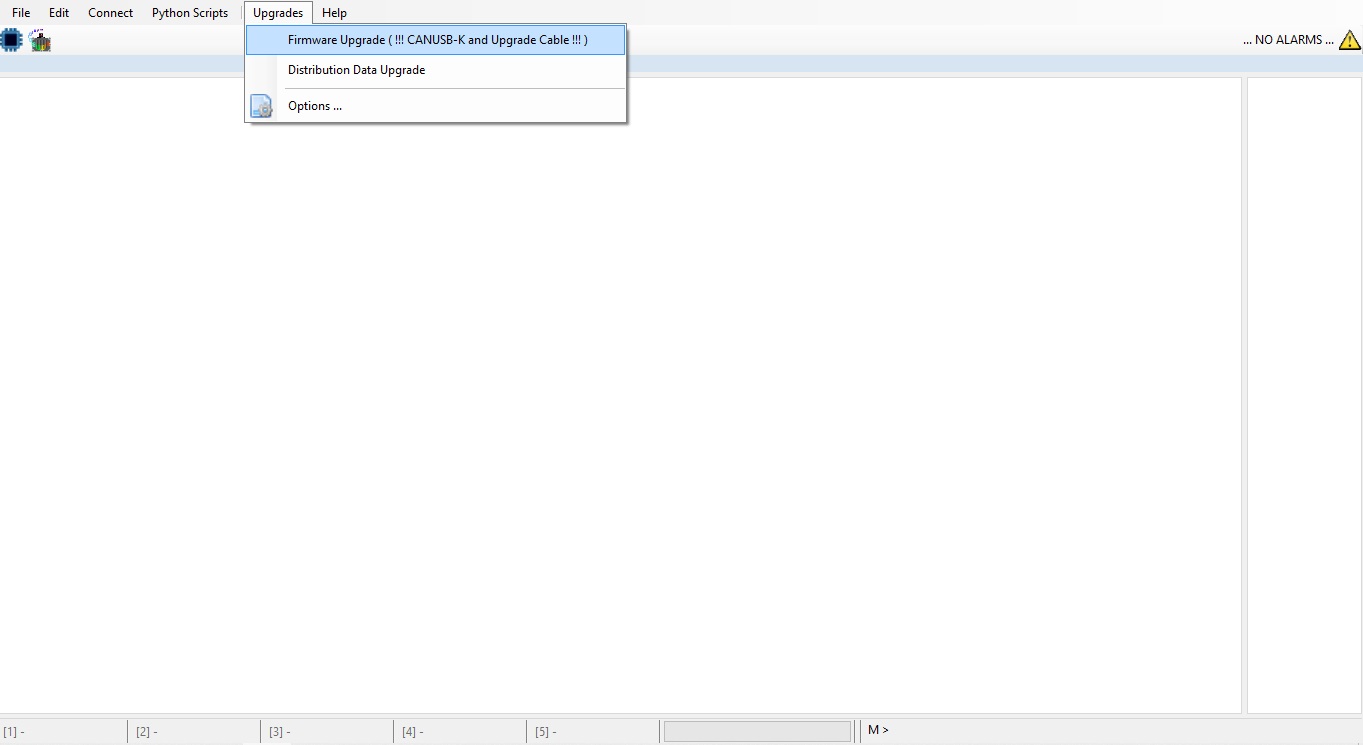
7. From Upgrades select Firmware Upgrade
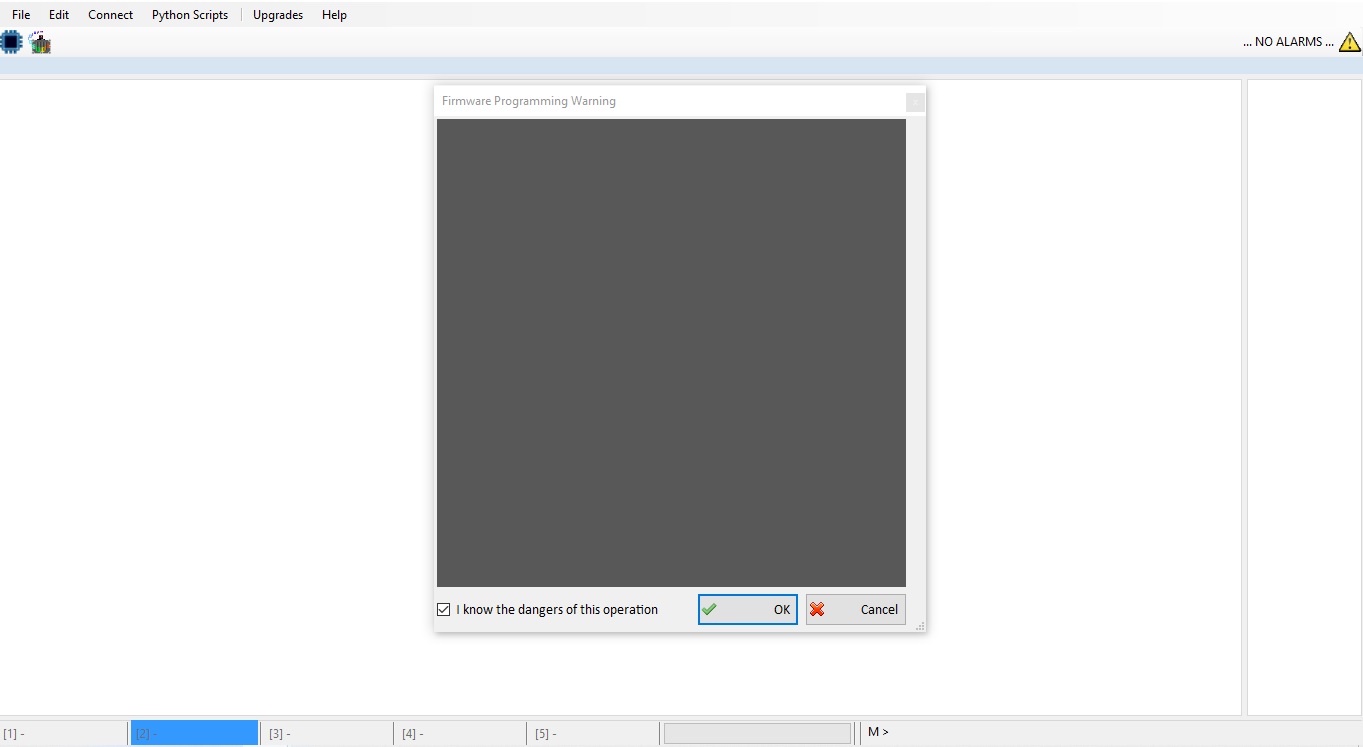
8. Check the flag and click OK
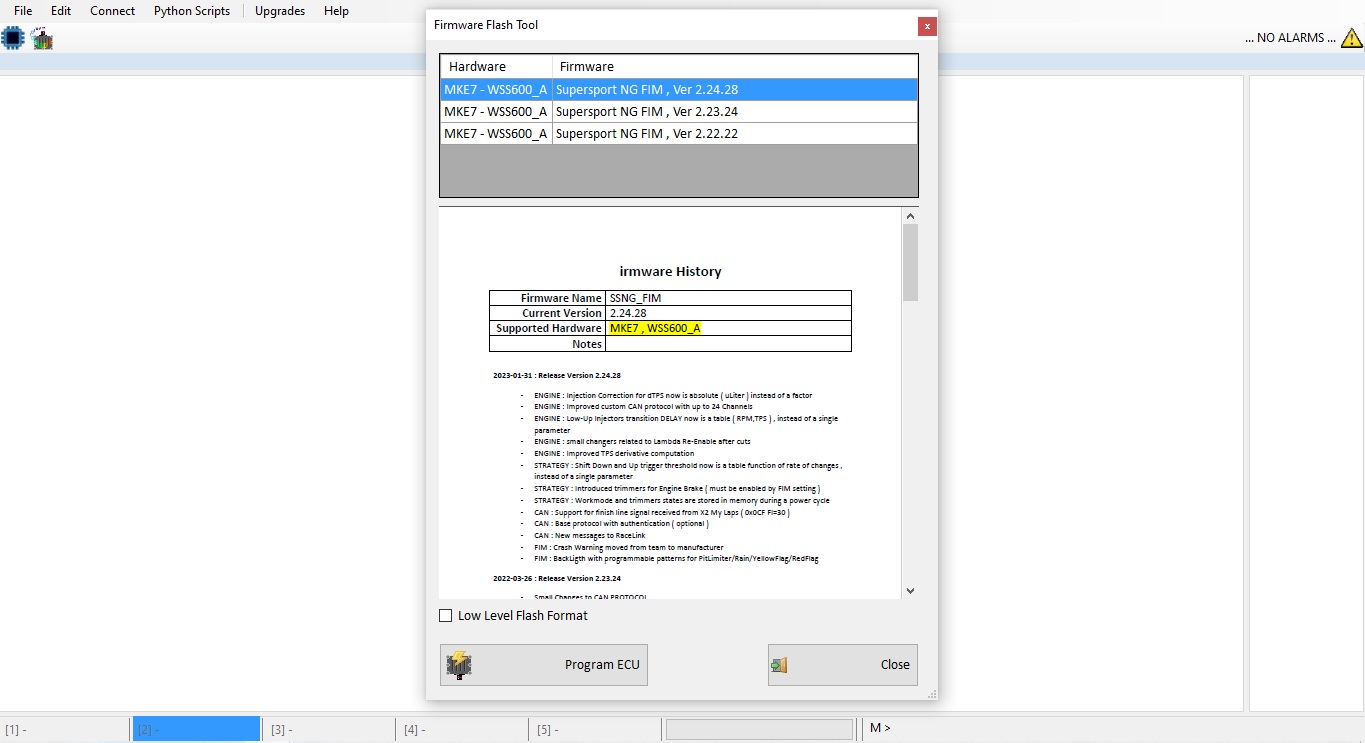
9. Choose the Firmware version to install. Please notice that each Firmware supports a specific hardware, shown in the Hardware column AND in the Firmware History document highlighted in yellow as shown in the image below.
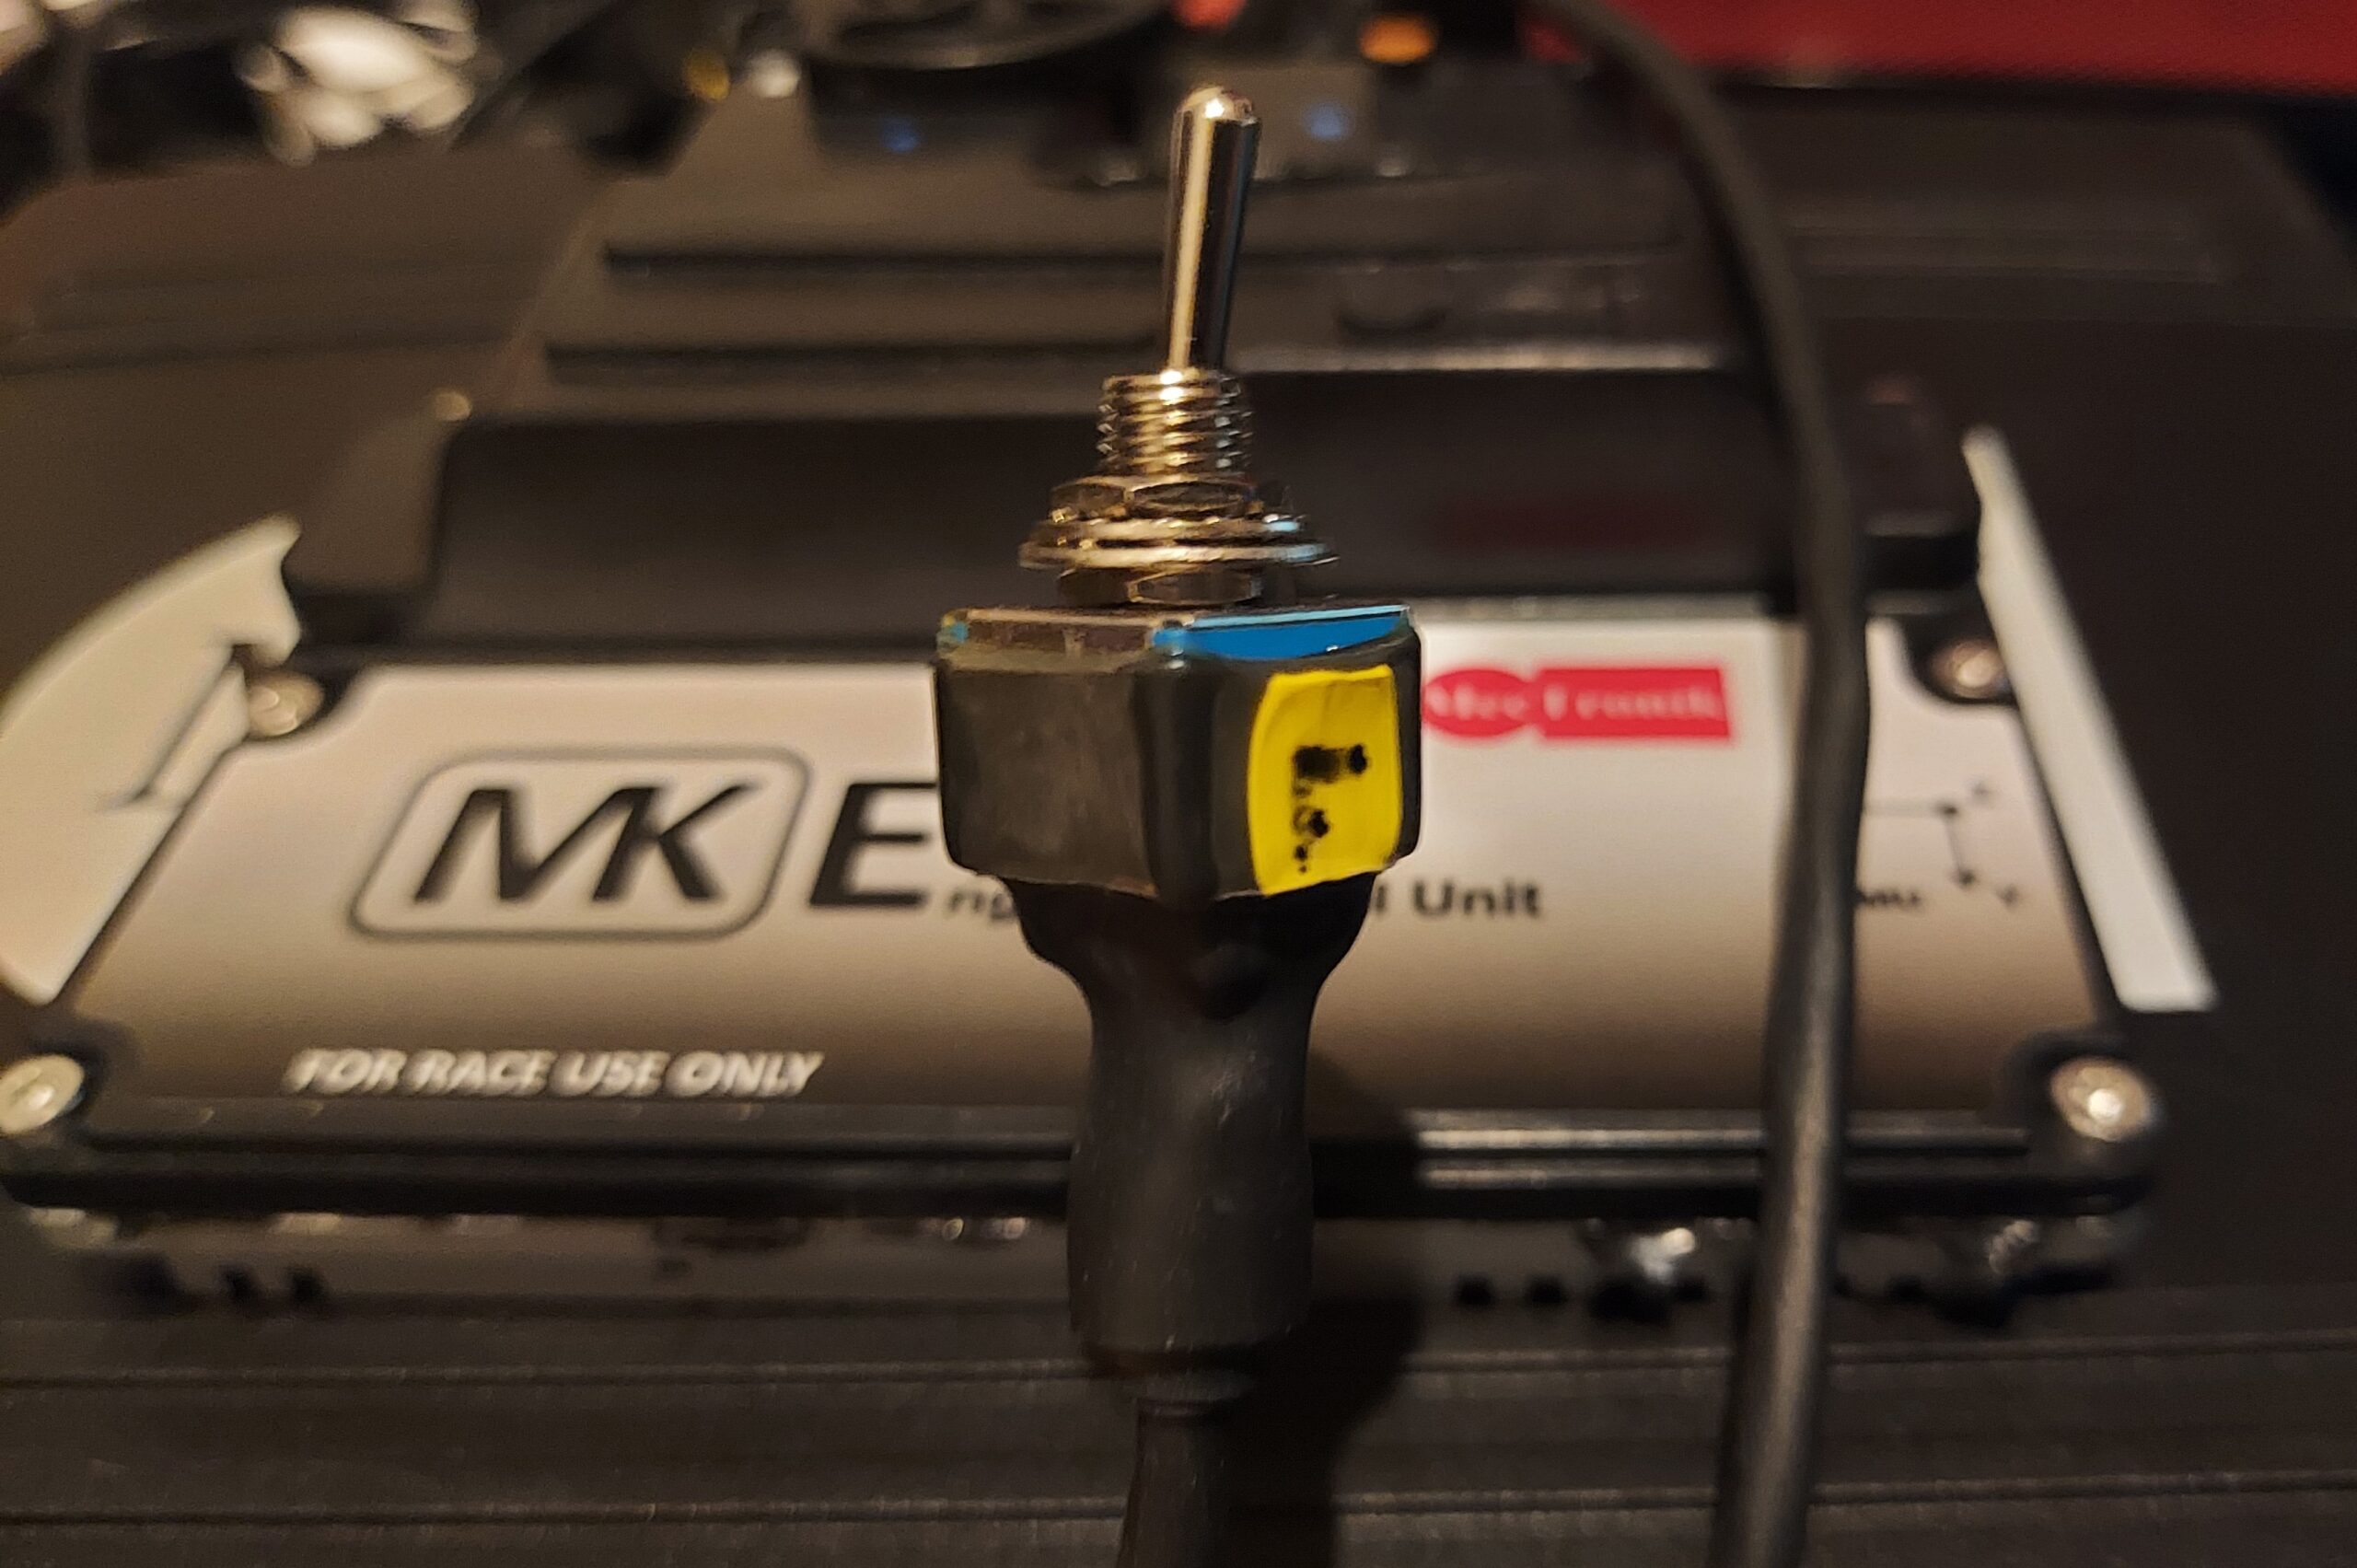
10. Press Program ECU, a pop up window will ask to switch the ECU to FLASH MODE. The Programming Kit switch has 3 positions. In the center the ECU is OFF, on the yellow side the ECU is in FLASH MODE, on the black side the ECU is ON. Push the switch to FLASH MODE (yellow side) and then OK on the computer.
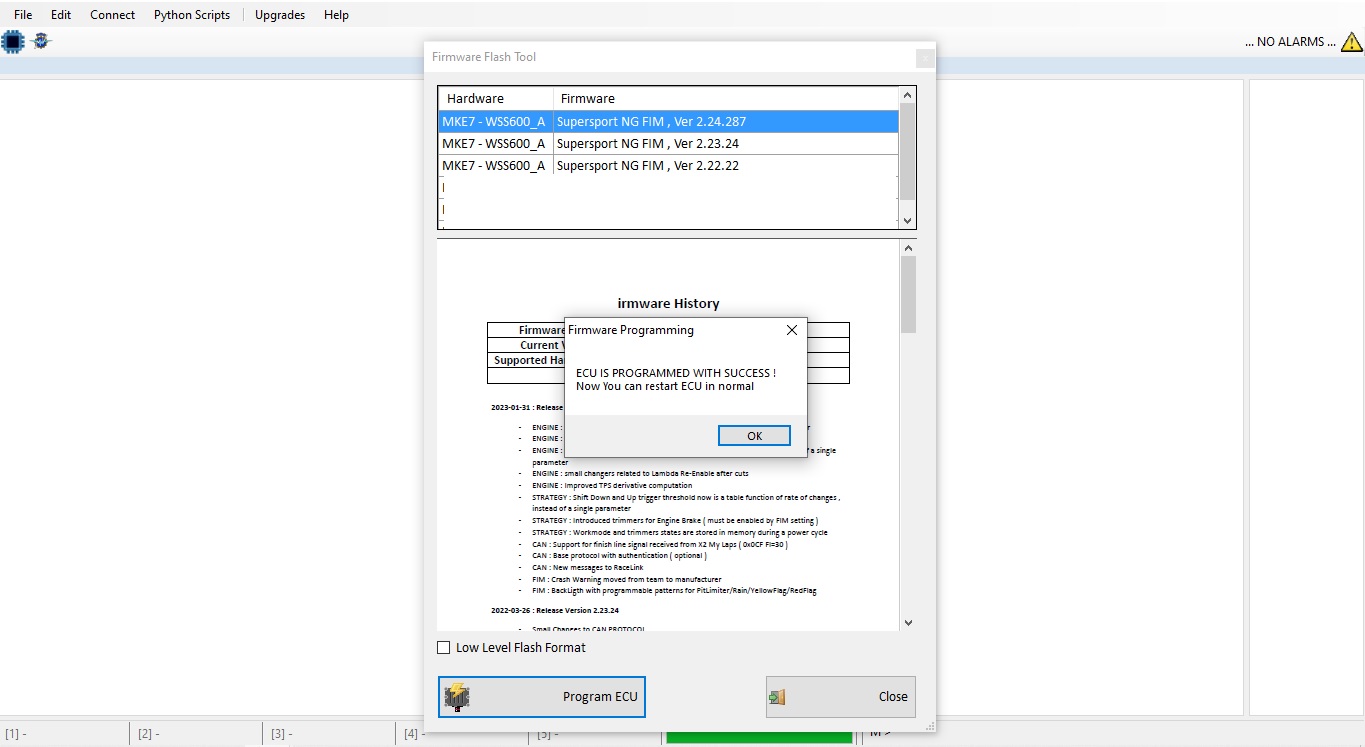
11. When the firmware has been written a window will pop up
12. Power off the ECU (switch in central position or disconnect power supply).
13. Power back ON the ECU (switch pushed on the black side with power supply connected)

14. The next step is to write an engine or .dis (model specific) file.
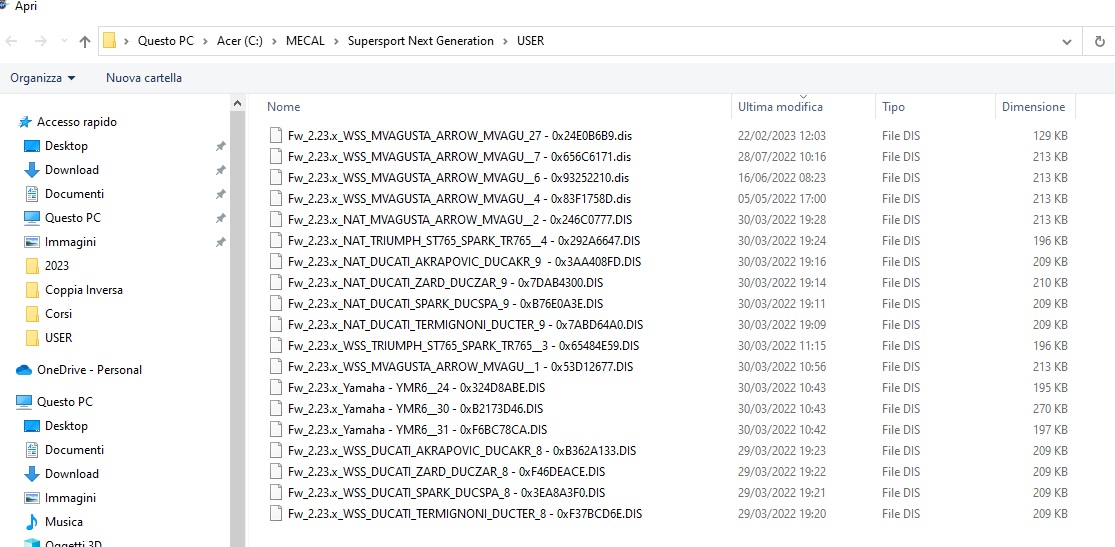
15. Select the desired engine
16. Read the engine details, Flag the box and press Write on ECU.
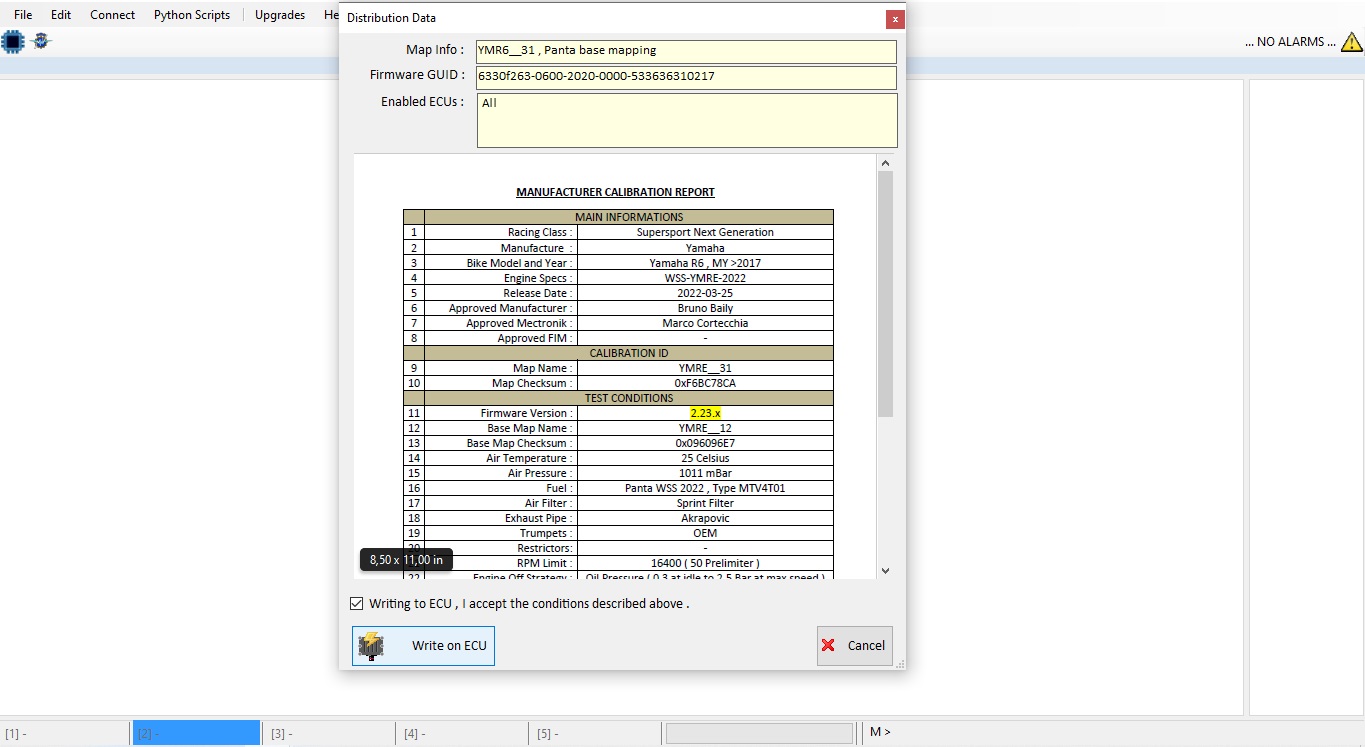
17. After writing the Engine Map power OFF the ECU. (For development or STANDARD users : please remember that engine maps can be written using the device for engine just as strategies).
18. Select Device ( the updated firmware )
19. Load the base startegy or import a previous version one. PLEASE NOTE: when importing an older version strategy CHECK ALL THE STRATEGY MAP. When importing an older version strategy map some values may be left to zero. New versions may have new or different tables or input values. Always check all your map when importing from older versions.

20. Switch ON the ECU.
21. Write and Flash the startegy on the ECU.
Here: https://www.youtube.com/watch?v=KJs9OyWBTM0 you can find a video on Firmware procedures.